| |
| DRAWings® Demo C : Create A Design From Vector Clipart |
 |
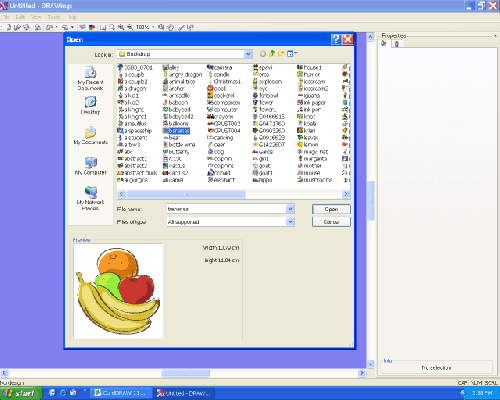
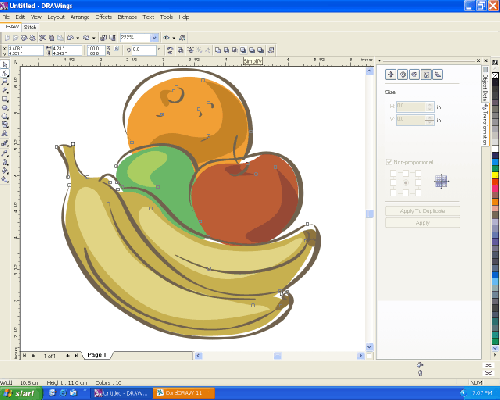
Step 1: We now open a new file and import the vector clipart into the "Draw" window. The format of the clipart can be EPS, CMX, etc. |
|
| |
|
Step 2: It is a good idea to select the major objects and click the "Simplify" icon on the top property bar. CorelDRAW® will remove the overlapping of all the objects selected. |
 |
| |
| |
Step 3: Click the "Stitch" Tab to generate stitches. |
 |
| |
| |
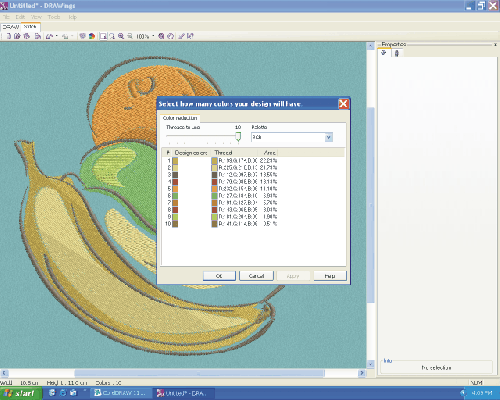
| Step 4: Click the Color Icon in the standard menu. We see that this design has 10 colors. |
|
| |
| |
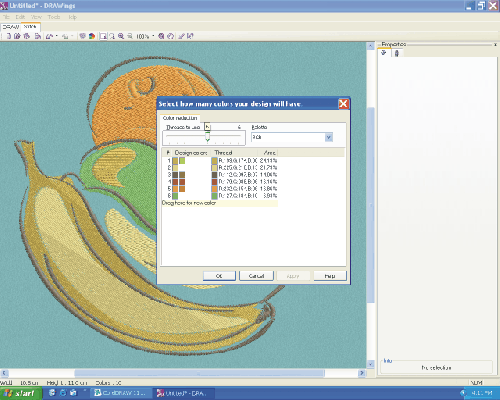
Step 5: Slide the color number tab towards the middle. This will reduce the colors from 10 to 6. In other words, the design has been changed from 10 threads to 6 threads. |
|
| |
| |
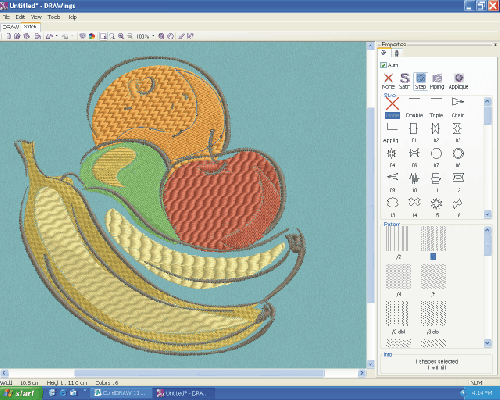
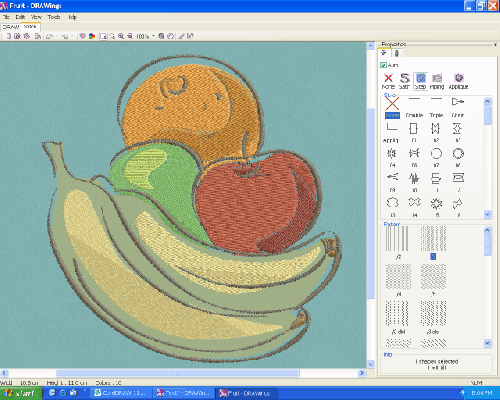
| Step 6: After the color reduction, select a few fill objects and apply several types of patterns to the fill stitches. Now the design is ready to sew. |
|
| |
| |
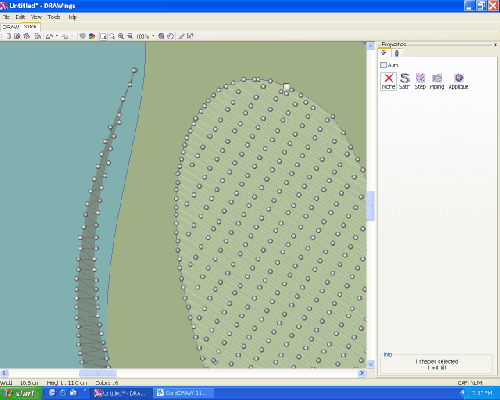
| Step 7: Let's now take a closer look at the stitch quality. First we turn off the 3D view from the top main menu, and select to show needle points. By zooming into the left portion of the big banana, we see the satin stitches have changed to Zigzag as the border gets narrower. When it comes closer to the end, it turns into running stitches. |
|
| |
| |
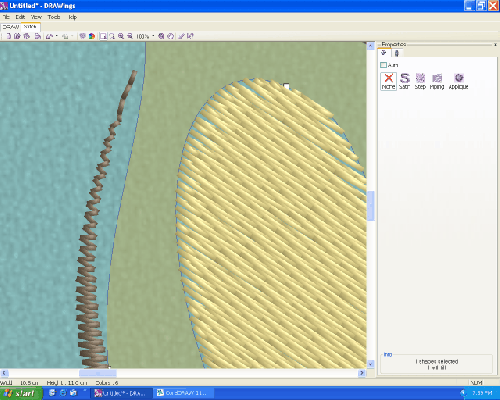
| Step 8: When we turn the 3D back on, the stitches are shown below. This is only one example of DRAWings® 's artificial intelligence generating professional quality stitch results. |
|
| |
|
| |